The blanching method for stripping skins in seconds
The fastest way to peel a large quantity of ripe peaches is brief hot-water blanching followed by an immediate ice water plunge. When working with a bushel or more of ripe fruit, tackling each peach with a standard kitchen paring knife wastes significant flesh and turns the kitchen counter into a slippery mess. The blanching technique relies on thermal shock to loosen the thin outer skin from the fruit's flesh without cooking the peach underneath, allowing you to slip the skin off cleanly using just your fingers.
To begin, bring a wide stockpot of water to a rolling boil on the stove and prepare a large mixing bowl filled with cold water and ice cubes nearby. Use a sharp paring knife to score a shallow "X" through the skin on the bottom tip of each peach opposite the stem. This score gives the expanding skin an escape route and creates natural peel tabs, making the outer layer easy to grab once the fruit exits the boiling pot.
Lower four to six peaches at a time into the bubbling water using a slotted spoon or spider strainer so the water temperature stays hot. Leave ripe fruit in the boiling water for thirty to forty-five seconds; if your fruit is slightly firm, leave it submerged for up to sixty seconds. Transfer the heated fruit directly into the ice bath immediately to halt any internal cooking, letting them chill for one full minute until cool to the touch.
Remove the chilled fruit from the ice bath and take hold of the corner flaps where you scored the base. The peel should slide away smoothly in large ribbons without pulling away the juicy fruit below. If the skin resists and refuses to slide, the peach was either picked too green or needs another fifteen seconds in boiling water to loosen the skin bond properly.
Peeling without boiling water or extra pots
Setting up boiling pots and bowls of ice water makes sense for preserving full bushels, but stripping skins for a quick afternoon snack or single pie calls for a mess-free alternative. You do not need to boil water to peel fresh peaches cleanly if you have the right tool and properly conditioned fruit. A standard flat vegetable peeler often skates across fuzzy peach skins or tears the tender flesh underneath, but a serrated fruit peeler grips the waxy skin securely and glides smoothly along the contours.
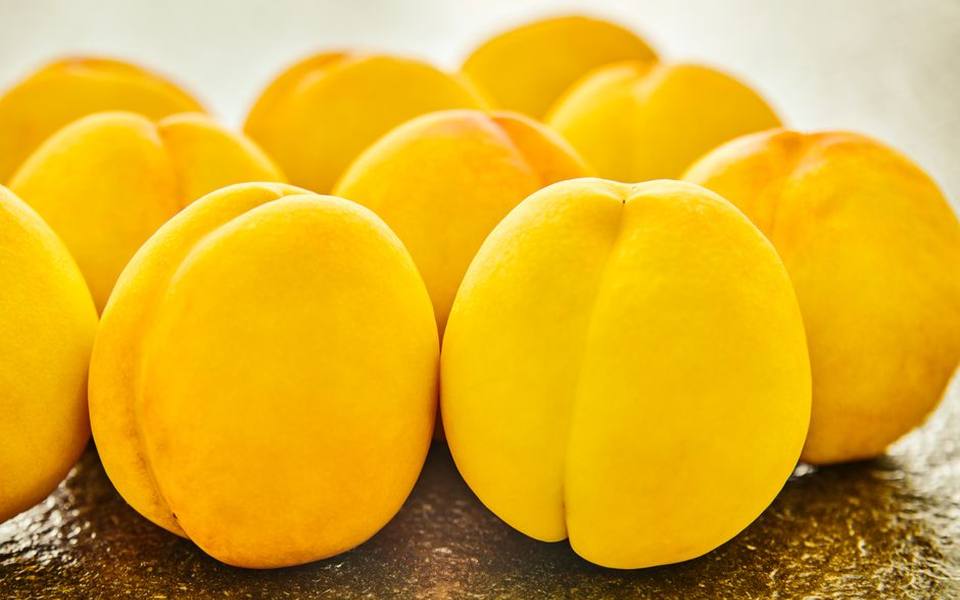
To peel fruit raw without blanching, hold the peach securely in the palm of your non-dominant hand and pull the serrated peeler downward from stem to blossom end in long, deliberate strokes. The tiny micro-serrations catch the fuzzy epidermal layer without biting too deeply into the tender flesh, leaving behind almost all the sweet meat. This method works exceptionally well on fruit that remains slightly firm to the touch, where boiling water might fail to release the skin cleanly.
If you only have a traditional paring knife, peel the peach by carving a shallow spiral starting at the stem end, keeping your thumb braced against the fruit to control depth. Work over a shallow bowl to catch the runaway juices, and angle the blade almost parallel to the surface to minimize pulp loss. While knife peeling requires steady hand-eye coordination, it spares you the moisture and heat of a boiling water bath on hot summer afternoons.
Prepping fruit for cobblers, pies, and crisps
Bakers frequently debate whether peeling is strictly required before loading fresh fruit into a baking dish. For rustic crisps and rustic freeform tarts, leaving the skins intact is entirely acceptable because long baking times soften the skin until it is barely noticeable, while lending a gorgeous rosy hue to the bubbling syrup. However, for a traditional southern cobbler or a double-crust pie where a delicate, velvety texture is desired, removing the skins is almost always the better choice.
When peeling peaches for a cobbler, you want uniform slices roughly one-half inch thick to ensure consistent softening in the oven without the fruit collapsing into pure mush. After peeling using blanching or a serrated peeler, slice the peach along its natural vertical suture down to the stone. Rotate the knife around the circumference, gently twist the halves in opposite directions to separate them, and lift out the central stone before carving your wedges.
To protect your cobbler crust from turning gummy and waterlogged, toss your sliced fruit in a mixing bowl with a pinch of salt, your desired spices, and a small quantity of cornstarch or tapioca flour. Let the mixture rest for ten minutes so the peach slices release their excess surface moisture, which binds with the thickener into a luscious sauce during baking instead of soaking into the bottom dough layer.
Reading the signs of peak fruit ripeness
A peach picked before reaching physiological maturity will never develop its signature honeyed perfume or melting texture, no matter how long it sits on your kitchen counter. Understanding the clear signs of true ripeness saves you from the disappointment of dry, mealy fruit or bitter, skin-locked peaches. The first indicator is background color: examine the patch of skin directly around the stem cavity, where the peach was shaded from direct sun.
A ripe peach displays a creamy golden or warm yellow background hue around the stem indentation. If that background skin retains a greenish cast, the fruit was picked too early and will struggle to peel easily or soften properly. The brilliant red blush across the cheek is actually an indicator of sun exposure on the tree, not ripeness, so do not rely on red color alone when judging readiness.
Tactile evaluation must be done carefully to prevent bruising the delicate flesh underneath. Never press your thumb or fingertips directly into the side of a peach, which crushes the cells and causes brown spots within hours. Instead, cradle the entire fruit gently in your palm and apply soft, even pressure with your whole hand near the shoulders and stem end, feeling for a subtle "give" similar to a ripe avocado.
Regional harvest windows across the country
Harvest calendars vary significantly based on winter chill hours, springtime bloom dates, and local summer heat units across the country. In southern growing centers like Georgia and South Carolina, early varieties typically begin ripening around mid-May, with mid-season favorites hitting peak availability through late June and July, finally wrapping up in early August. In these warm regions, the long growing season allows commercial growers and farm stands to cycle through dozens of cultivars.
In mid-latitude fruit belts, such as farms featured across U-Pick Farms in New Jersey and surrounding Mid-Atlantic valleys, the bulk of harvest typically runs from mid-July straight through Labor Day. Moving into northern territories like western orchards in U-Pick Farms in New York and the Great Lakes shores of U-Pick Farms in Michigan, picking usually begins in late July or early August and stretches well into late September.
Because unseasonal spring frosts or summer heatwaves can easily shift harvest windows by a week or two in either direction, always check current orchard reports before making long drives. Commercial picking calendars offer great benchmarks, but local farm social pages and direct crop hotlines provide the definitive answer on which specific varieties are falling from the branches on any given weekend.
Understanding clingstone, freestone, and semi-cling varieties
The internal anatomy of a peach dictates how simple it will be to prepare in the kitchen. Peach cultivars fall into three clear botanical categories: clingstone, freestone, and semi-freestone. Clingstone varieties feature pit stone walls that are physically fused to the surrounding edible flesh by microscopic fiber threads, making it nearly impossible to pop the seed out without tearing the surrounding fruit into ragged scraps.
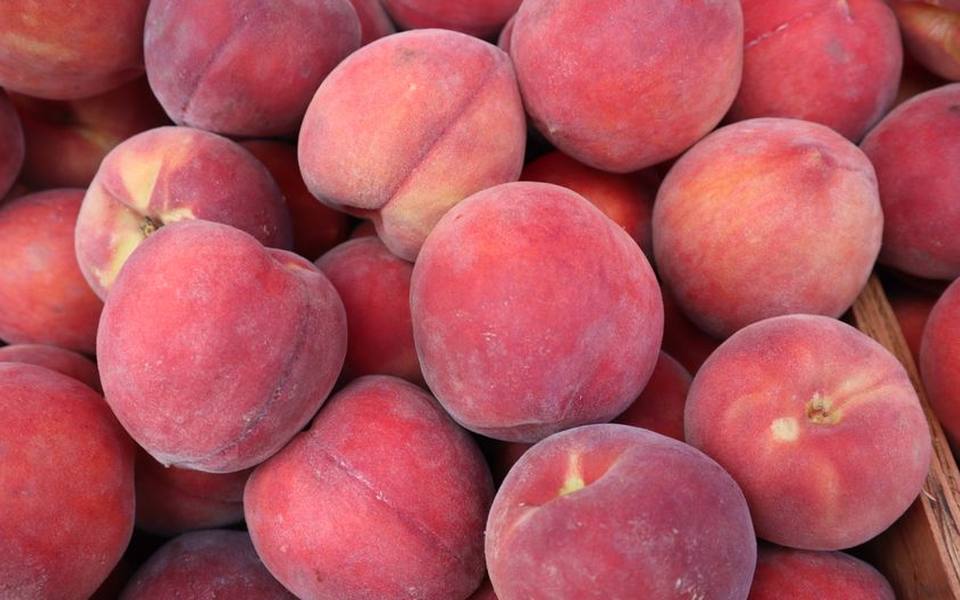
Clingstones are typically the earliest peaches to ripen in late spring and early summer. Because their flesh remains unusually firm and resilient under high heat, commercial canneries prize them for diced fruit cups and industrial syrups. For home cooks planning to freeze large volumes or make neat pie slices, however, wrestling with clingstone pits requires using a specialized curved pitting spoon or carving the flesh away from the core in irregular chunks.
Freestone peaches generally ripen during the middle and late summer months and are the undisputed favorite for home preservers and fresh eating. Once a freestone peach is sliced along its suture, twisting the halves allows the stone to drop out cleanly or be lifted away with zero resistance, leaving smooth, intact cavities. Semi-freestone or semi-cling varieties act like clingstones when slightly firm, but release their pits with relative ease once allowed to soften to full tabletop ripeness.
Flash freezing and preserving texture for winter
Freezing fresh peaches is the most reliable way to lock in tree-ripened flavor without subjecting the fruit to the high heat of pressure canning. The biggest pitfall in freezing fresh fruit is enzymic browning, which turns golden slices an unappetizing muddy brown once exposed to oxygen. To freeze successfully, you must deactivate these enzymes and keep the slices separated during their initial transition into solid ice.
After peeling and slicing your fruit, immediately drop the pieces into a large bowl containing an anti-browning solution. You can dissolve commercial ascorbic acid powder in cold water according to package directions, or mix three tablespoons of bottled lemon juice into four cups of cold water. Gently turn the slices in the solution for two minutes to coat every surface before lifting them out with a slotted spoon and letting them drain on clean kitchen towels.
Arrange the drained slices in a single layer on rimmed baking sheets lined with parchment paper, ensuring no two slices touch each other. Slide the baking sheets into your freezer for three to four hours until the slices freeze rock-hard. This process, known as flash freezing, prevents the fruit from consolidating into an inseparable icy boulder once packaged.
Transfer the frozen slices into heavy-duty zip-top freezer bags or vacuum-seal bags, pressing out every bubble of residual air before sealing. Slices packed this way maintain excellent culinary quality for eight to twelve months. When baking pies or cobblers in winter, add the frozen slices straight into the filling mixture without thawing them first, which prevents the crust from becoming oversaturated with melted juice.
Locating orchards and planning a picking trip
Nothing matches the sweetness of fruit picked warm off the branch, which is why thousands of families travel to rural orchards every season. Finding local harvest spots has become much simpler through nationwide farm directories that track regional harvest conditions. When looking for nearby operations, browsing state-specific listings through Pick Your Own Farms and Orchards allows you to pinpoint properties offering public field access.
West Coast travelers can explore vibrant agricultural pockets across U-Pick Farms in California, while East Coast residents have abundant access through local country roads across the Northeast and Midwest. Before driving out, contact the farm directly or check their morning status updates to confirm field availability, as popular orchards can be picked clean by midday following heavy weekend crowds.
When arriving at an orchard, dress for uneven orchard rows, sharp twigs, and summer heat by wearing closed-toe shoes and a wide-brimmed hat. Many growers provide sturdy buckets or cardboard baskets, but bringing your own shallow containers lined with soft towels helps protect bottom layers from being bruised under their own weight during the drive home. Remember that picked peaches do not get sweeter off the tree, so only harvest fruit displaying rich background color.
Counter ripening and post-harvest storage
Handling your freshly picked harvest properly at home determines whether your fruit achieves luscious perfection or rots prematurely. Fresh peaches should never be placed directly into a cold household refrigerator if they are still firm. Cold temperatures below fifty degrees Fahrenheit disrupt the natural ripening enzymes in immature stone fruit, resulting in a mealy, dry texture and a complete loss of aroma known as internal breakdown.
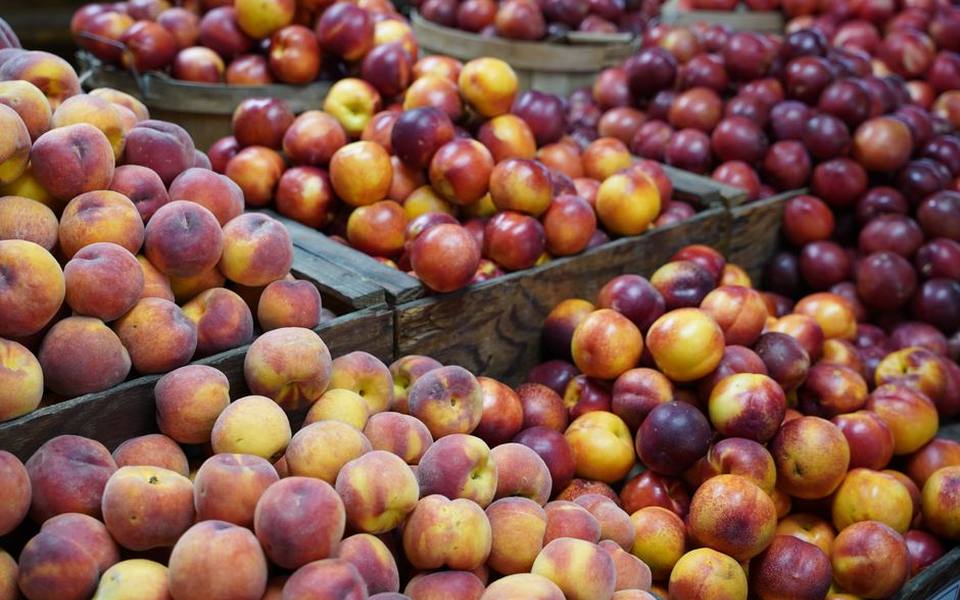
Instead, arrange firm fruit stem-side down in a single layer across your kitchen counter or dining room table, keeping them out of harsh, direct sunlight. Give them breathing room rather than stacking them in deep bowls where trapped moisture encourages gray mold. If you want to speed up ripening, place several peaches inside a standard brown paper bag loosely folded at the top; the bag captures the natural ethylene gas emitted by the fruit while still allowing humidity to escape.
Once a peach yields gently to the touch and fills the room with rich perfume, its ripening cycle is complete. At this mature stage, you can safely transfer the fruit to your refrigerator's crisper drawer set to high humidity. Chilling fully ripe peaches halts their rapid decline, extending their peak eating window for another three to five days until you are ready to eat, peel, or process them into preserves.
Simple syrup packing and pantry alternatives
While dry flash freezing on baking sheets is ideal for baking applications, packing sliced fruit in liquid syrup provides superior protection against freezer burn if you plan to enjoy fruit throughout long winter months. Light syrup locks out all atmospheric oxygen and helps peach slices retain their natural structural firmness when thawed for morning yogurt, oatmeal, or fruit salads.
To make a light freezing syrup, dissolve two cups of granulated sugar into four cups of lukewarm water until clear, then chill the mixture thoroughly in your refrigerator. Place your peeled and sliced peaches directly into rigid freezer-safe plastic containers or straight-sided glass canning jars, leaving at least one-half inch of headspace at the top to accommodate liquid expansion as it freezes.
Pour the chilled syrup over the fruit slices until they are completely submerged, placing a small crumbled piece of water-resistant wax paper or parchment on top of the fruit before securing the lid. The paper keeps the top fruit slices pressed below the liquid level, preventing discoloration. Keep these containers upright in the deepest section of your freezer for up to twelve months of premium shelf life.
Published 2026-09-20 · reviewed with each rebuild, last September 2026.
Find u-pick farms near you
The directory lists 3,339 u-pick farms by state and city — pick your state or use the “Near me” button in the header.
More guides
-
 Buying
When Is Strawberry Season? Peak Months and U-Pick Picking Guide
-
 Buying
Pumpkin Patch Visitor Guide: Opening Dates, Pricing, and Selection Tips
-
 Buying
How to Pick Ripe Produce: Melons, Roots, Citrus, and Greens
-
 Buying
Best Apples for Baking Pies and Cakes: Crispness and Flavor Guide
-
 Buying
What Is Raw Cow Milk? Benefits, Safety Rules, and Sourcing
-
 Buying
Apple Picking Guide: Bushel Measurements, Costs, Storing, and Washing
-
 Money
MoneyBlackberry Farm Pricing Guide: Costs, Accommodations, and Seasonal Farmstead Skills
-
 Buying
A Guide to Shopping Local Farmers Markets, Farm Stands, and CSA Boxes
-
 Buying
Apple Orchard and Cider Mill Guide: U-Pick Apples, Cider, and Fall Treats
-
 Buying
Fall Agritourism Guide: Corn Mazes, Pumpkin Patches, and Autumn Festivals
-
 Buying
U-Pick Flower Fields: Guide to Tulips, Lavender, Sunflowers, and Dahlias
-
 Buying
Agritourism Experiences: Goat Yoga, Farm Stays, and Rustic Barn Venues
-
 Owning
Seasonal Guide to U-Pick Berries and Fruit Orchards: Cherries, Berries, and Peaches
-
 Buying
Fall Agritourism Guide: Pumpkin Patches, Corn Mazes, and Harvest Festivals
-
 Owning
On-Farm Floral Workshops and Flower Arrangement Classes Guide
-
 Owning
A Complete Guide to U-Pick Fruit Orchards: Berries, Stone Fruit, Citrus, and Vines
-
 Buying
Honey Farm Visits, Local Apiaries, and Raw Honey Buying Guide
-
 Owning
Comprehensive Guide to Fresh Apples, Cider Pressing, and Canning Recipes
-
 Owning
Livestock Feeds and Feeding Equipment Selection Guide
-
 Owning
Fruit Picking Guide: U-Pick Orchards and Harvest Tools
-
 Buying
Flower Farm Guide: U-Pick Fields, Fresh Bouquets, and Workshops